Replace Those Relays

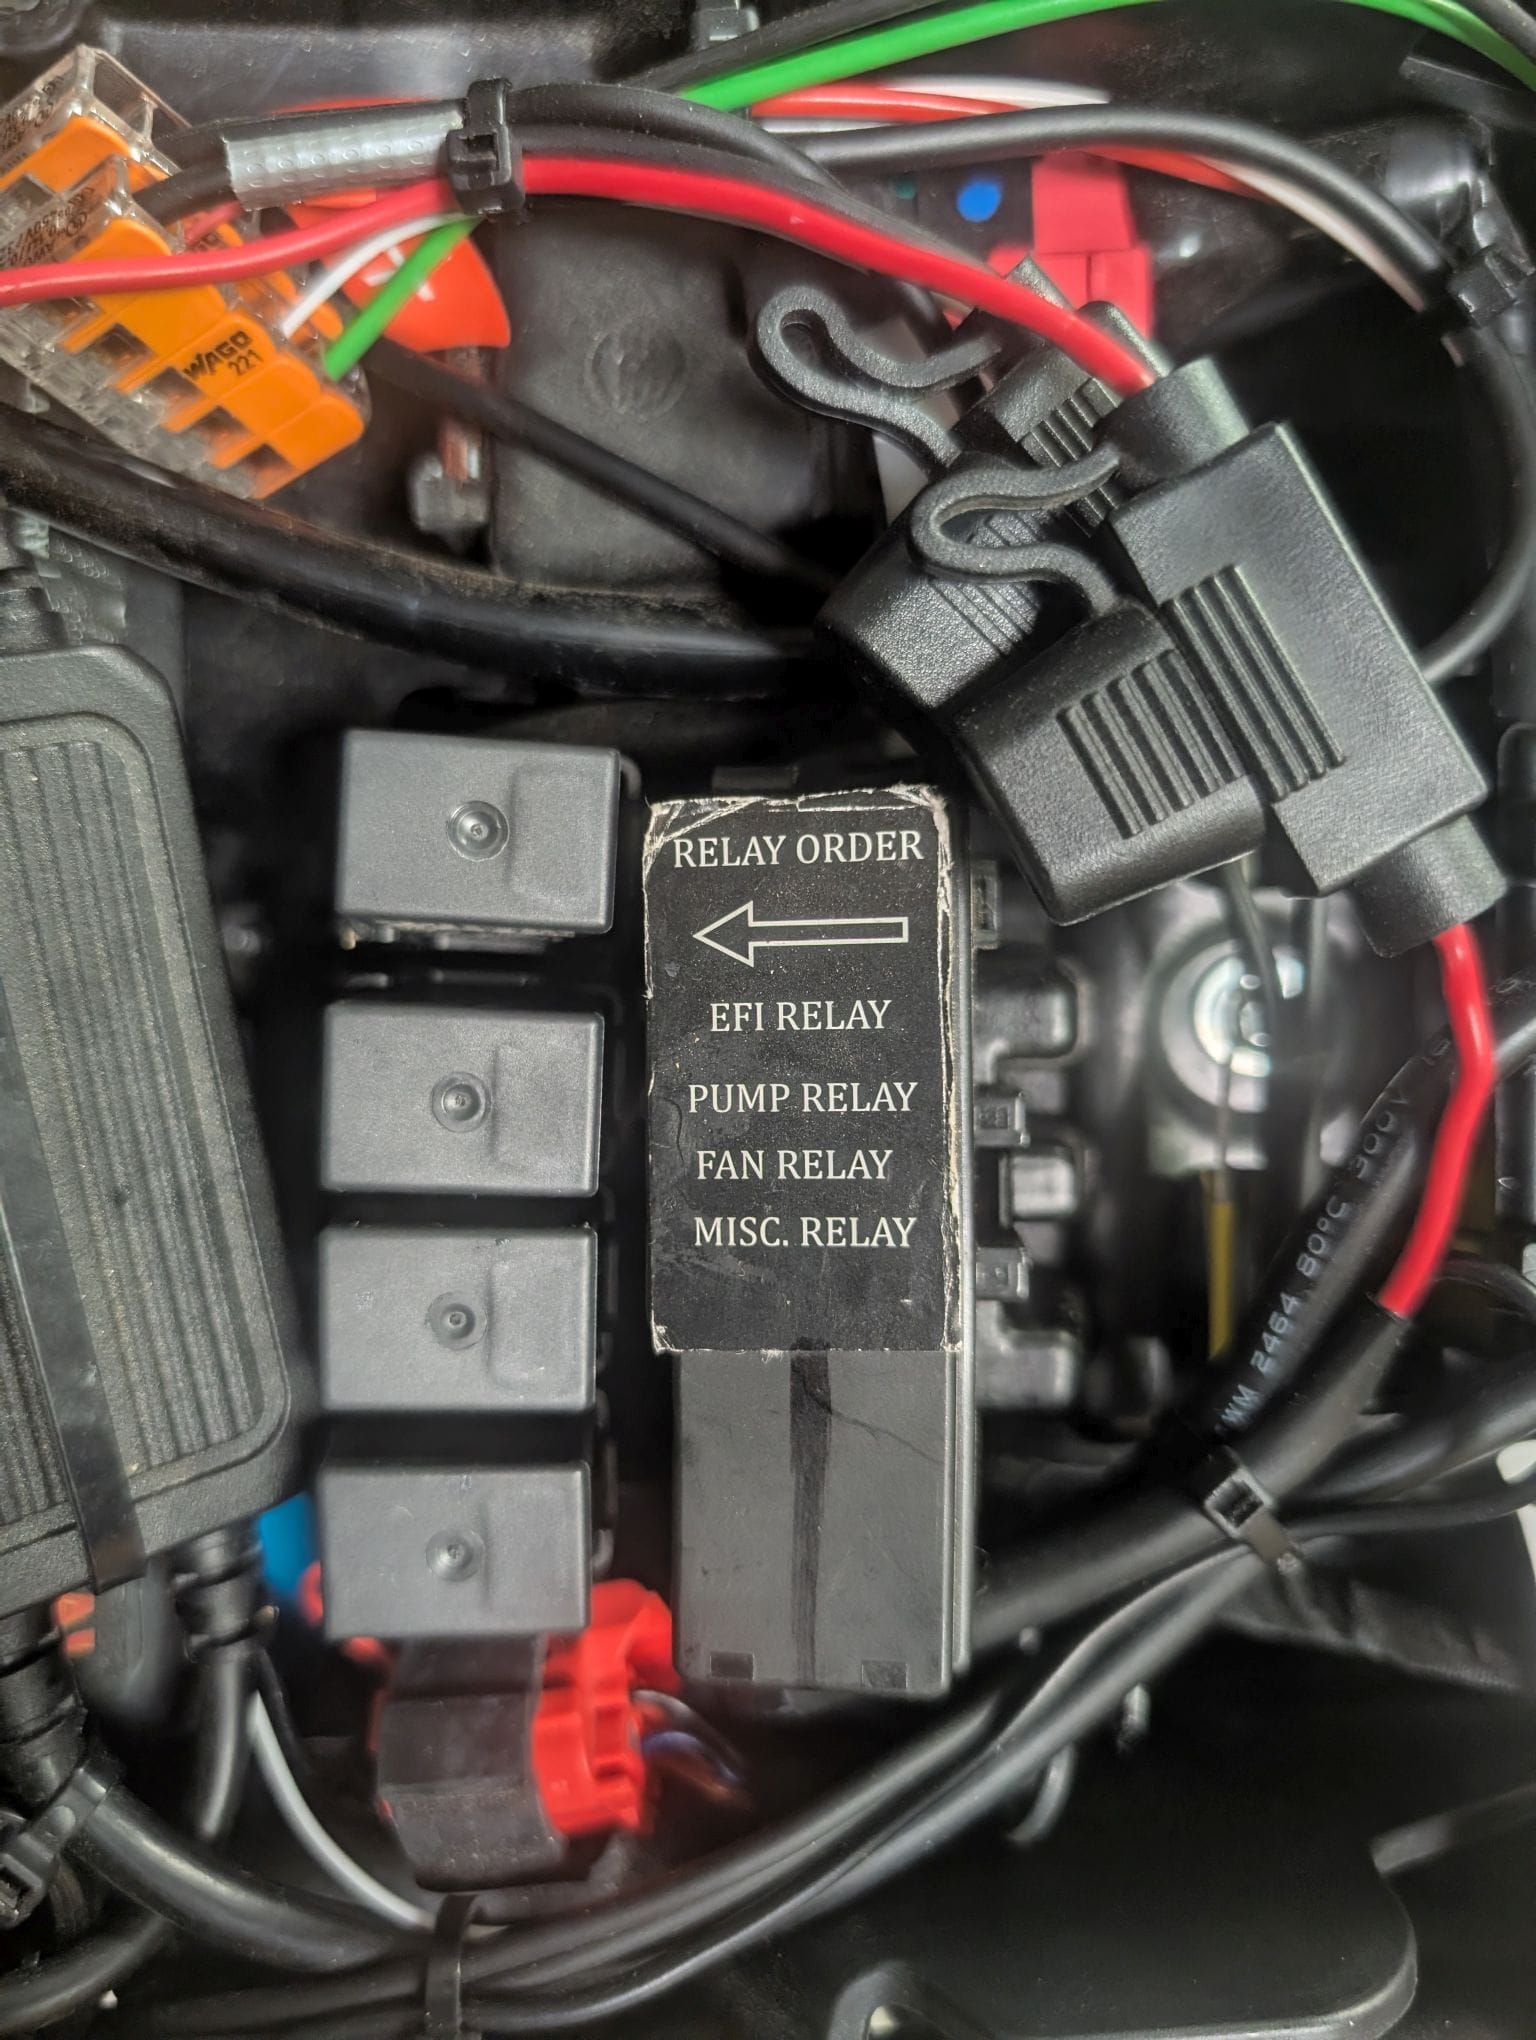
The 2026 Royal Enfield Himalayan 450 has quickly earned a reputation as a capable adventure motorcycle, equally at home on the highway and remote backroads. Like any modern motorcycle, however, it relies on several electrical relays to control critical systems. While these relays are relatively inexpensive, they are also one of the few components that can fail without warning and leave you stranded.
Many experienced adventure riders choose to replace the factory relays with higher-quality sealed units before they become a problem. Whether you're preparing for a cross-country trip, exploring remote forest service roads, or simply want peace of mind, replacing the four primary relays—the EFI relay, Fuel Pump relay, Cooling Fan relay, and Miscellaneous relay—is inexpensive preventative maintenance.
As mentioned before, this is my second Himalayan. I can say from experience, ditch the factory relays as they are quite unpredictable. I had an issue with the fule pump relay on my past bike. Was it the realy OR was it the GOBS of dielectric grease that they push into those. I am not sure but I replaced my current bikes relays with the Bosch Mini-Relay - 0332011007 from Amazon. At only $7 each, it is a simple and inexpensive way to give you a bit more piece of mind.
What Does a Relay Do?
A relay is essentially an electrically controlled switch. Instead of sending high electrical current through the motorcycle's switches and ECU, the ECU activates a relay using a small amount of current. The relay then allows a much larger current to power accessories like the fuel pump or cooling fan.
Think of a relay as a remote-controlled heavy-duty switch.
Without relays:
- Switches would wear out quickly.
- Wiring would need to be much larger.
- The ECU could not safely control high-current devices.
The Four Main Relays
The Himalayan 450 uses four identical micro ISO relays.
1. EFI Relay
The EFI relay powers much of the motorcycle's electronic fuel injection system.
It supplies power to:
- ECU
- Fuel injection system
- Sensors
- Ignition components
Symptoms of Failure
- Bike won't start
- Intermittent starting
- Random stalling
- Check Engine Light
- No power to ECU
A failing EFI relay may work one minute and fail the next, making diagnosis frustrating.
2. Fuel Pump Relay
This relay powers the electric fuel pump inside the fuel tank.
When you turn the key ON, you should hear the pump prime for a few seconds. That sound is controlled by this relay.
Symptoms
- Fuel pump doesn't prime
- Engine cranks but won't start
- Sudden engine shutdown
- Intermittent no-start condition
Without fuel pressure, the engine simply cannot run.
3. Cooling Fan Relay
Adventure bikes spend plenty of time crawling through trails and traffic where airflow is minimal.
The cooling fan relay turns the radiator fan on when the ECU detects high coolant temperatures.
Symptoms
- Fan never comes on
- Bike overheats
- Temperature warning light
- Coolant boiling over
A failed fan relay can quickly lead to overheating during slow riding.
4. Miscellaneous Relay
The fourth relay powers several secondary circuits depending on model year and ECU programming.
Although it doesn't control a single major component, failure can produce strange electrical issues such as:
- Accessories not working
- Dash problems
- Lighting issues
- Unexpected electrical behavior
Because all four relays are identical, replacing them together eliminates one common source of future electrical problems.
Why Replace Them Before They Fail?
Adventure riders often replace relays proactively for several reasons.
Heat
Relays live near the engine where temperatures can become extremely high.
Heat eventually weakens:
- Contact surfaces
- Internal springs
- Plastic housing
- Coil insulation
Moisture
Adventure bikes frequently encounter:
- Rain
- River crossings
- Mud
- Washing
Even weather-resistant relays can eventually suffer corrosion.
Dust and Dirt
Fine dust can work its way into connectors, increasing electrical resistance and generating additional heat.
Vibration
Single-cylinder engines produce considerable vibration.
Over thousands of miles, vibration can fatigue internal relay components.
Low Cost Insurance
A complete set of quality relays often costs less than a tank of fuel.
Considering one failed relay can leave you stranded miles from civilization, they're among the cheapest reliability upgrades available.
Should You Carry Spares?
Absolutely.
Since all four relays are interchangeable, carrying one or two spare relays takes almost no space. When I replace my original ones, I cleaned up two and store them on my bike...just in case.
If any relay fails during a trip, you can quickly swap in the spare and continue riding.
Tools Needed
Replacing the relays requires very few tools.
You'll need:
- 10 mm socket or wrench (removing battery connection - always remove the negative)
- Small flat screwdriver (optional)
- Needle-nose pliers (optional)
- Dielectric grease (this is a must)
- Rags
- Electric Contact cleaner
Total time:
Approximately 10–15 minutes.
Relay Location
On the 2026 Himalayan 450, the relay block is located beneath the rider's seat, near the battery.
Once the seat is removed, you'll see four identical relays mounted together in rubber holders.
Because they're identical, it's a good idea to replace them one at a time to avoid mixing them up.
Step-by-Step Replacement
Step 1: Turn Off the Motorcycle
Remove the key and allow the motorcycle to cool.
Step 2: Remove the Seat
Unlock and remove the rider's seat according to the owner's manual.
Disconnect the negative battery terminal.
Locate the relay block beside the battery.
Step 3: Identify the Relays
You'll see four identical relays.
Replace them one at a time to maintain their original positions.
Step 4: Remove One Relay
Grip the relay firmly.
There is a locking tab on the fuse box side. Using a small blade screwdriver, push the tab to unlock.
Pull straight upward while gently rocking it. I found using a small pair of narrow nose pliers extremely helpful.
Avoid pulling on the wires.
Step 5: Inspect the Connector
Look for:
- Green corrosion
- Bent terminals
- Dirt
- Burn marks
Thoroughly clean the connector before installing the new relay. You will find tons of white dielectric grease. Get out as much as you can. I am not sure why they push so much grease in there.
Step 6: Apply Dielectric Grease
A thin coating of dielectric grease around the connector helps reduce moisture intrusion and future corrosion. Just apply a small amount to each side of the new connector.
Do not pack the connector completely full like the factory.
Step 7: Install the New Relay
Push the relay firmly into the connector until fully seated. You should hear the clip click AND you should be able to pull on it and it feels seated.
Step 8: Repeat
Repeat the process for the remaining three relays.
Step 9: Reconnect the Battery
Reconnect the negative battery terminal (you should have removed it).
Install the seat.
Step 10: Test Everything
Turn the ignition ON.
Verify:
- Fuel pump primes
- Check Engine Light cycles normally
- Motorcycle starts
- Cooling fan operates when engine reaches operating temperature
- No warning lights remain illuminated
Preventative Maintenance Tips
While you're replacing the relays, it's also a good opportunity to:
- Inspect battery terminals for corrosion.
- Check nearby wiring for chafing or loose connections.
- Verify fuse holders are clean and secure.
- Make sure the relay block is firmly seated in its rubber mount.
- Confirm no moisture has accumulated under the seat.
These quick checks can help prevent other electrical issues before they become trail-side repairs.
Final Thoughts
The EFI, Fuel Pump, Cooling Fan, and Miscellaneous relays are small components that play a vital role in the reliability of your 2026 Royal Enfield Himalayan 450. Because they endure heat, vibration, moisture, and thousands of switching cycles, they are natural wear items over the life of the motorcycle.
Replacing all four relays as preventative maintenance is a simple, low-cost project that can significantly reduce the risk of an unexpected electrical failure. Combined with carrying a spare relay on longer adventures, this upgrade offers inexpensive insurance for riders who venture far from home. Whether you're commuting, touring, or tackling rugged backcountry trails, a fresh set of quality relays helps ensure your Himalayan is ready for the next adventure.
As a side note, there is also the starter relay.
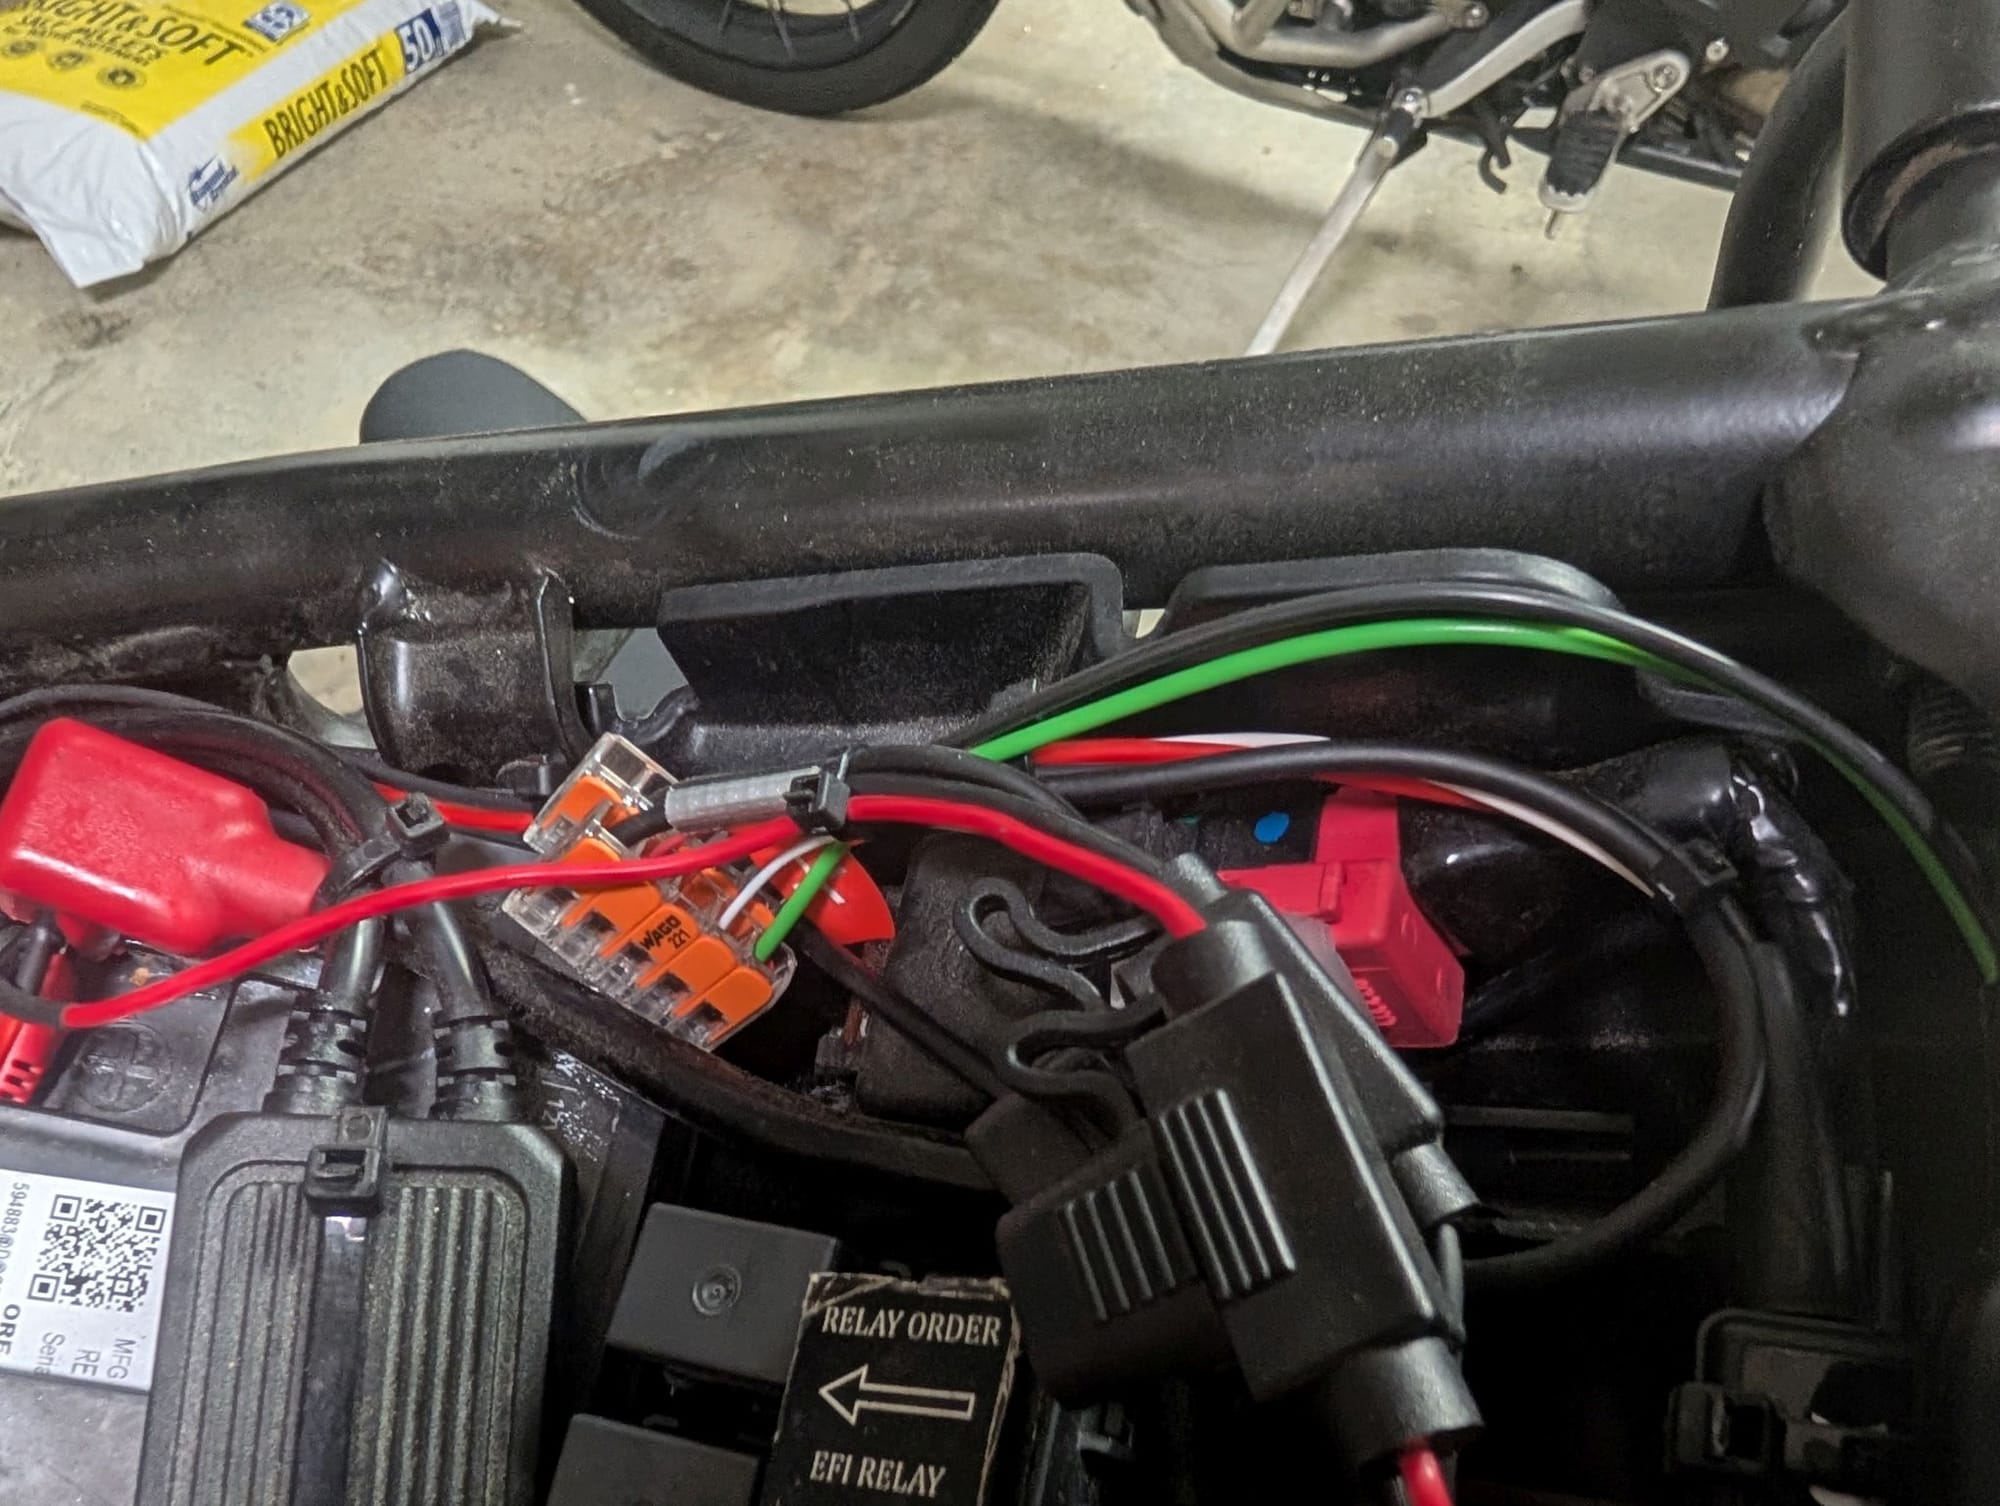
Its the red connection. It is full of dielectric grease as well. I did not replace it but just cleaned it and applied a new thin layer of grease. If this fails, you can always push start the bike (unlike a failed fuel pump). Happy riding.