Revving Up The Himalayan Exhaust

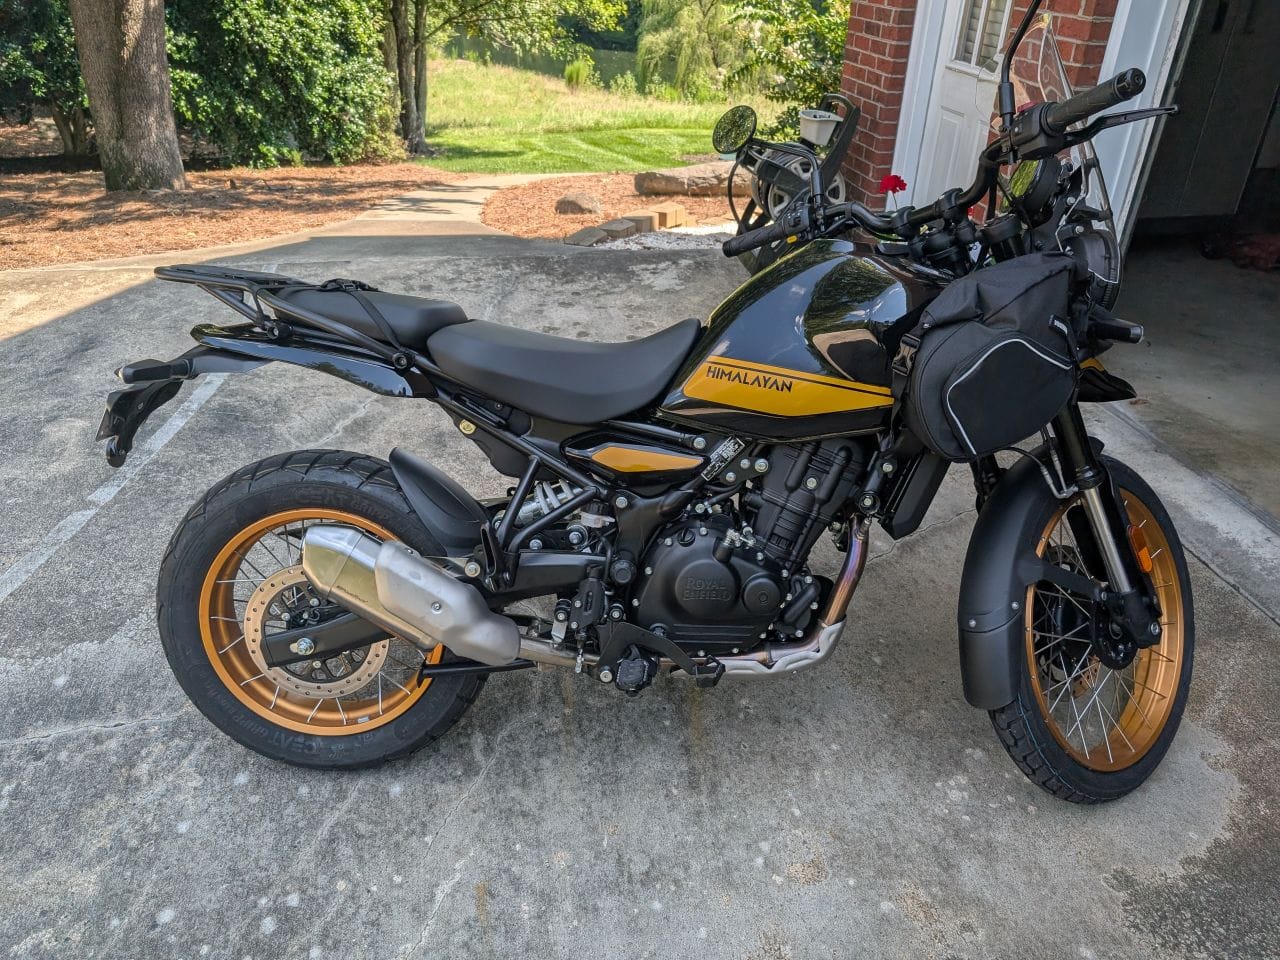
As mentioned in previous posts, there were a few changes that I wanted to make right away after getting the bike. The first two were the windshield and the horn. Next up is the exhaust system.
Before bringing the bike home, I did a lot of research on this year/model and had a good idea what things I wanted to change. The exhaust was not high on my list since I did not realize what an impact it could make other than the sound. After reading more about the exhaust, I came across the Powerage exhaust system. It is priced very reasonably so I decided to purchase it and give it a go.
I did not take a ton of pictures installing the setup. Main reason is that there are a number of really good videos showing how to do it. It is really a very easy process. No modifications are needed as it is a complete slip on system. What I will note are a few things to be aware of during the installation. The installation is not difficult. Takes less than 2 hours.
When I got the box, I opened it and it is pretty simple.
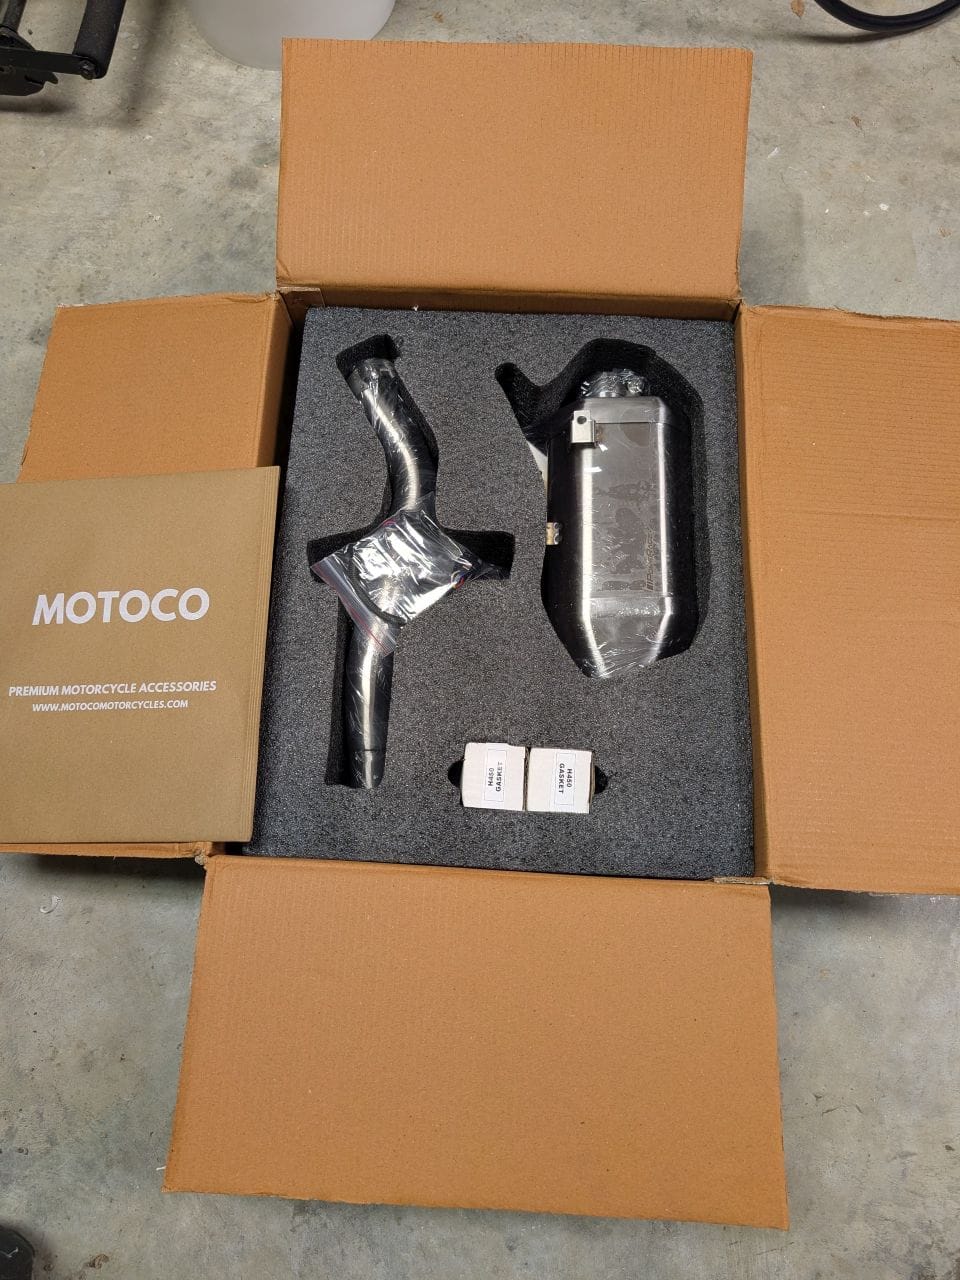
I unpackaged the system. There is a link to an installation video included with the documentation. That video is quite good. Here is another video as well.
Installing the Powerage exhaust on the Himalayan 450
The tools needed are pretty basic. I would advise a torque wrench as well. To start, you just work from the exhaust down and then reverse. I will admit that it does help to have a second person but it is not mandatory. I will also state that my bike in less than two weeks old so there is not corrosion or dirt on the bike which also made the installation easier.
Remove the two hex bolts holding the heat shield onto the exhaust. Be sure to save the two clips as you will need to install these on the new muffler. Once the heat shield has been removed, loosened the clamp attaching the muffler to the catalytic converted. You do not need to remove this clamp. Just loosen it. Also, you will not need to re-use this clamp as a new one is provided (its on the muffler). After that, remove the bolt that holds the muffler on the bike. Once that is removed, you should be able to pull the muffler from the bike.
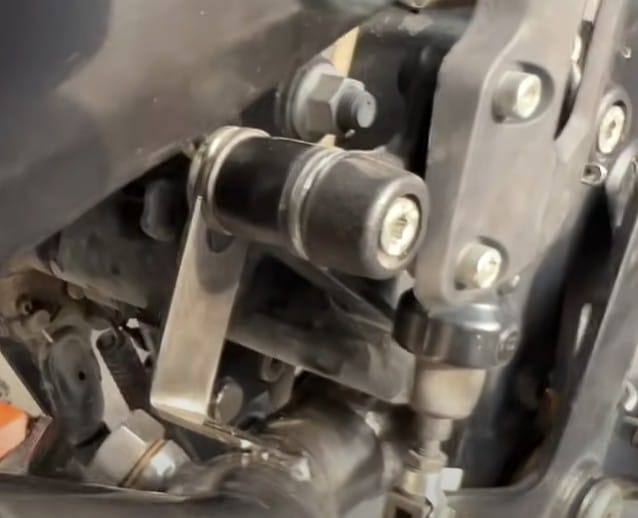
Next, remove the three hex bolts that hold the brake assembly to the bike. There is no need to remove the cover (the one with two bolts). I point this out in the image below.
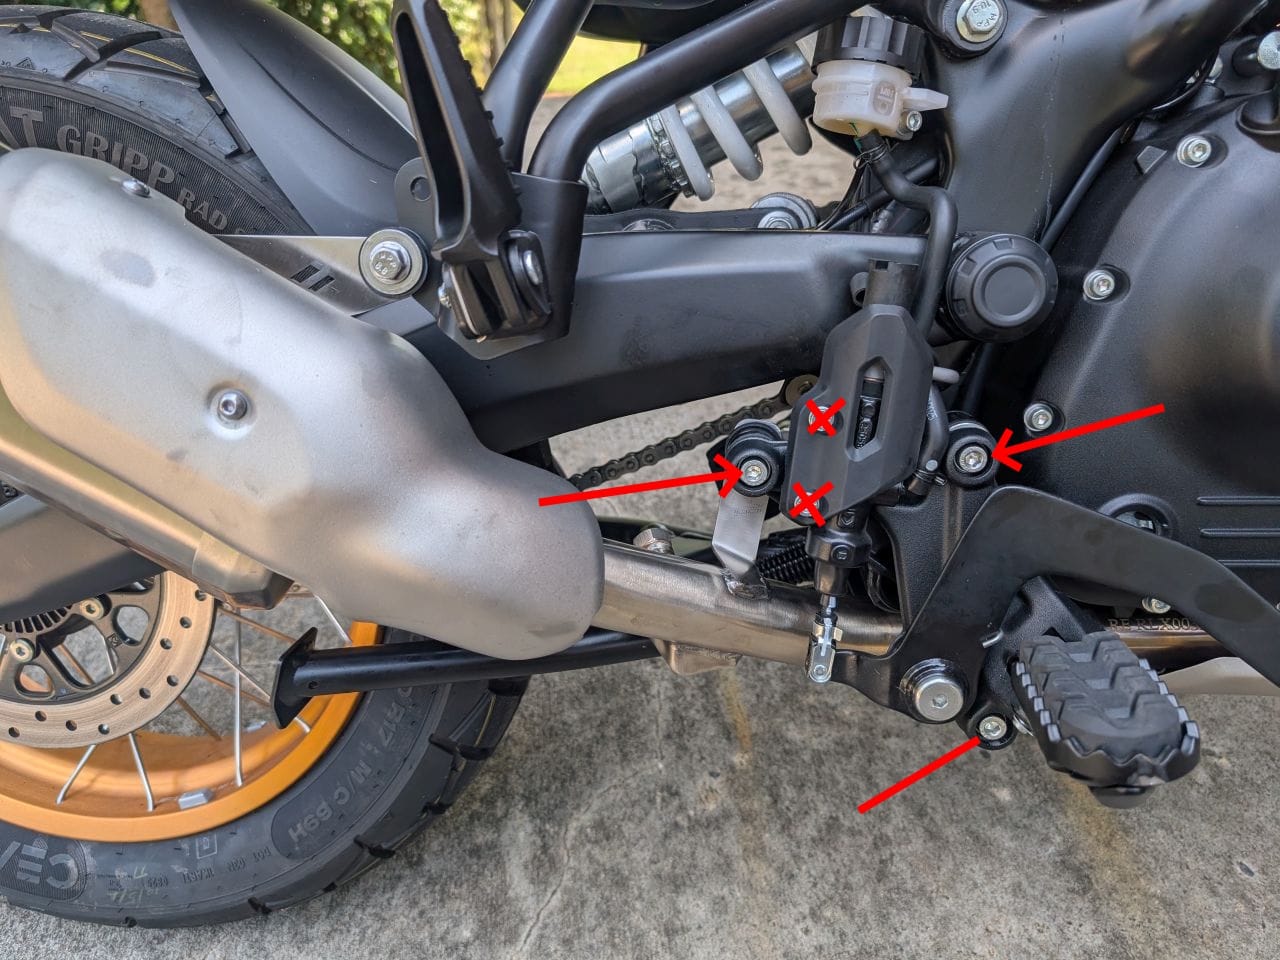
Here is a tip. You do not need to worry about the "nut" the top two bolts are screwed into. It it is one piece that both bolts use so it cannot spin as you tighten/loosen. The bottom bolt is another story. You will most likely need to use a large crescent wrench to hold the back nut while you loosen it (mine was spinning). Once you have those three bolts removed, just push the assembly off to the side. It is covering up a bolt you will need to loosen holding up the catalytic converter.
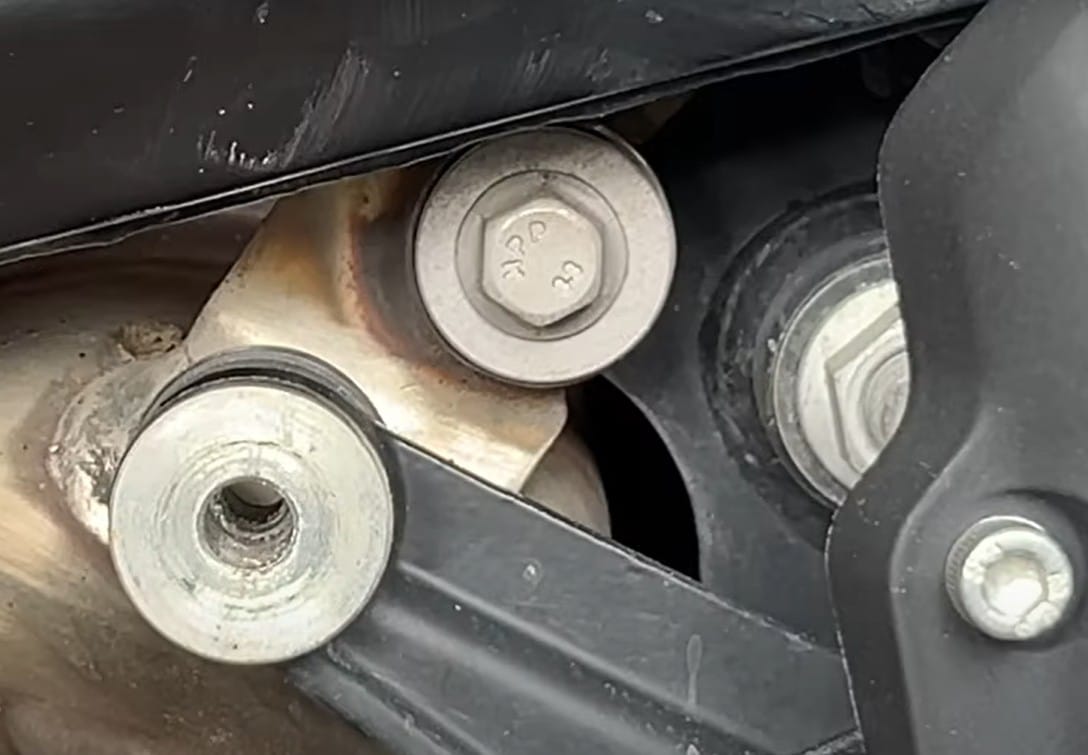
There are two bolts holding the converter in place. The closest one is very easy to get to and take off. If you look across on the other side, there is another one. You will need to use a socket with a long extension and a wobble since it is not a straight line. Put an open end wrench on the nut and it should come loose without any issues. Once those bolts are off, loosen the clamp until the converter is loose.
You do NOT need to remove the back tire to get the converter out. What I found worked for me is you need to raise the back tire. Take it off the center stand and you will see a bit more room was created between the tire and the converter. But it is not enough. Have someone sit on the bike and THEN you will have enough room to wiggle it out. Once out, you do not need to re-use the clamp.
One other tip. The bolt on the far side is not going to be used. Since you cannot really get the bolt out without a lot of significant work, just put the nut back on it and tighten it up. No harm, no foul.
Now you are ready to assemble. Remember those baffles? I found it easier to go ahead and stick them in both the de-cat pipe and the exhaust first. Take the de-cat pipe and stick it on the header. You will be able to tell the orientation because of the hanger you will need to bolt on and also the rubber that will hit the center stand will face down.
Go ahead and snug up the clamp (do not tighten it all the way yet). We will not install the three bolts. The first one to put in should go to the bracket (upper left). You must put the bracket BEHIND the nut.
It will make perfect sense if you forget since the bracket will have nothing holding it in place if you do not sandwich in-between the nut. With that bolt in place, go ahead and install the remaining two bolts. Remember that one of the bolts you may have to hold the nut or it will spin.
Once those are in place, go ahead and put the muffler on (do not forget the baffle). Install the bolt for the hanger and snug it up. Same with the clamp. You are almost done with the installation. You need to tighten the clamps first. Be sure to hold the pipe and/or muffler in place while you do this. You want to make sure they have a good seal.
Once the clamps are good and tight, tighten up the rest of the bolts. Remember to use a torque wrench. I think the 3 bolts are 25Nm and the muffler hanger bolt is 35Nm. Once those are all tight, use a bit of thread licker for the heat shield bolts. Again, make sure those clips are in place first! Tighten snug and you are all done.
Now go ahead and start the bike and listen for leaks around the clamps. No leaks? Give it some gas and listen to that new sound!
Something else you may have noticed in the box is an allen wrench. This is used to remove the decibel baffle. Look in the end of the muffler. See that bolt? If you remove it, that whole baffle will come out making it even louder. But before you attempt the removal (or installation), make sure that you stuff a paper towel in the hole in case you drop it. You do NOT want it going in the muffler. That would be quite annoying having it bounce around in there.
I left mine in for now (I did take it out to see how it sounded). I may take it out in the future but wanted to ride around as is to see what it is like.
My first impressions is the bike has a bit more pep. It is definitely louder. It also sounds a bit meaner. I like the new sound and hope it will help others aware that I am around as well (cars particularly). I think this was a good investment.