Wiring Accessories on the Himalayan 450

I have been holding off doing any new wiring on the Himalayan 450 until my auxiliary lights arrived. Part of the problem was I kept putting off buying them but this bike really needs more light. The headlamp is LED and better than the older Himalayans but still needs quite a bit of help. Now that the days are shorter, riding to work in the morning is quite a task.
I only need to wire four accessories:
* Thunder box
* SP Connect - phone mount with charging
* Auxbeam LED Lights - auxilliary lights
* Heated jacket plug
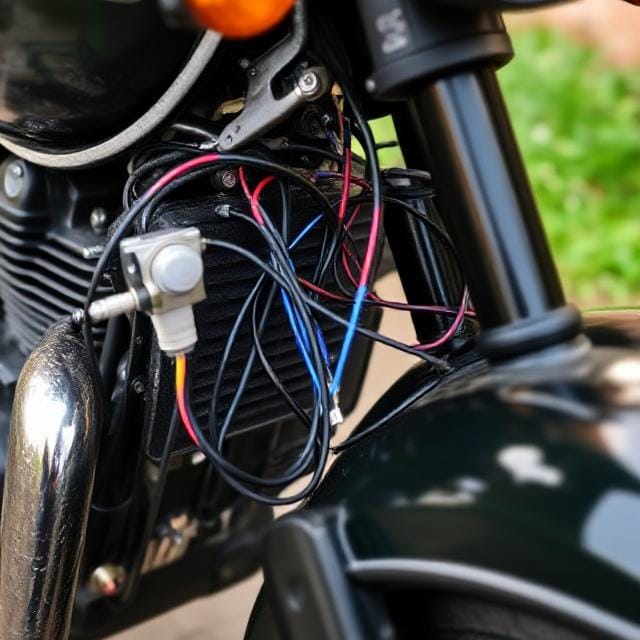
In order to do a nice clean job with the wiring, you need to remove the gas tank. Not that it is difficult, I just wanted to wait until I had everything then just work on it one afternoon. The two accessories that require hiding the wires are the SP Connect phone mount (with charger) and the Auxbeam LED Lights auxiliary lights. The Thunder Box is all under the seat as is the heated jacket plug. If you have not heard of the Thunder Box, you can read about my write-up for my Triumph. I have used this for years and absolutely love it. No more finding a ignition wire or wiring directly to the battery. This box does it all and protects against shorts.
The phone mount is the same as on my Triumph. I cannot say enough good things about this mount. Rock solid. Anti-vibration. I have had this mount for years and have had NO issues with it (and I have never lost a phone riding). The lights were new. I did not want to spend tons of money but wanted more light. What I do like about these is the various modes and light colors (amber, white, intense white, etc). I really cannot report on these since they are brand new. Only time will tell. As for the Thunder Box, love this and would never wire anything to my bike without it.
One of the first thing to figure out is where to put the items under the seat. I will say that the Himalayan 450 is short on space under the seat. I removed the seats and then proceeded to take off the gas tank. I will not describe how to do this since there are a TON of videos on how to do this. It is really quite simple. I would advise doing this when you are almost out of gas. Not that the tank is super heavy, with the lighter weight, you are less likely to scratch it while removing. One thing all the videos do mention is that some gas will trickle out when you remove the hose from the fuel pump. Not that it is a ton of gas, it is more than a trickle. Have paper towels underneath it while removing it. Have more handy and before you proceed, wait for it to stop dripping. It can make a mess.
With all that removed, you should see that there is plenty of space for running wires from the forks to under the seat. You will also notice that there are not many areas for hiding items. The first order of business is locating a place to mount the Thunder Box.
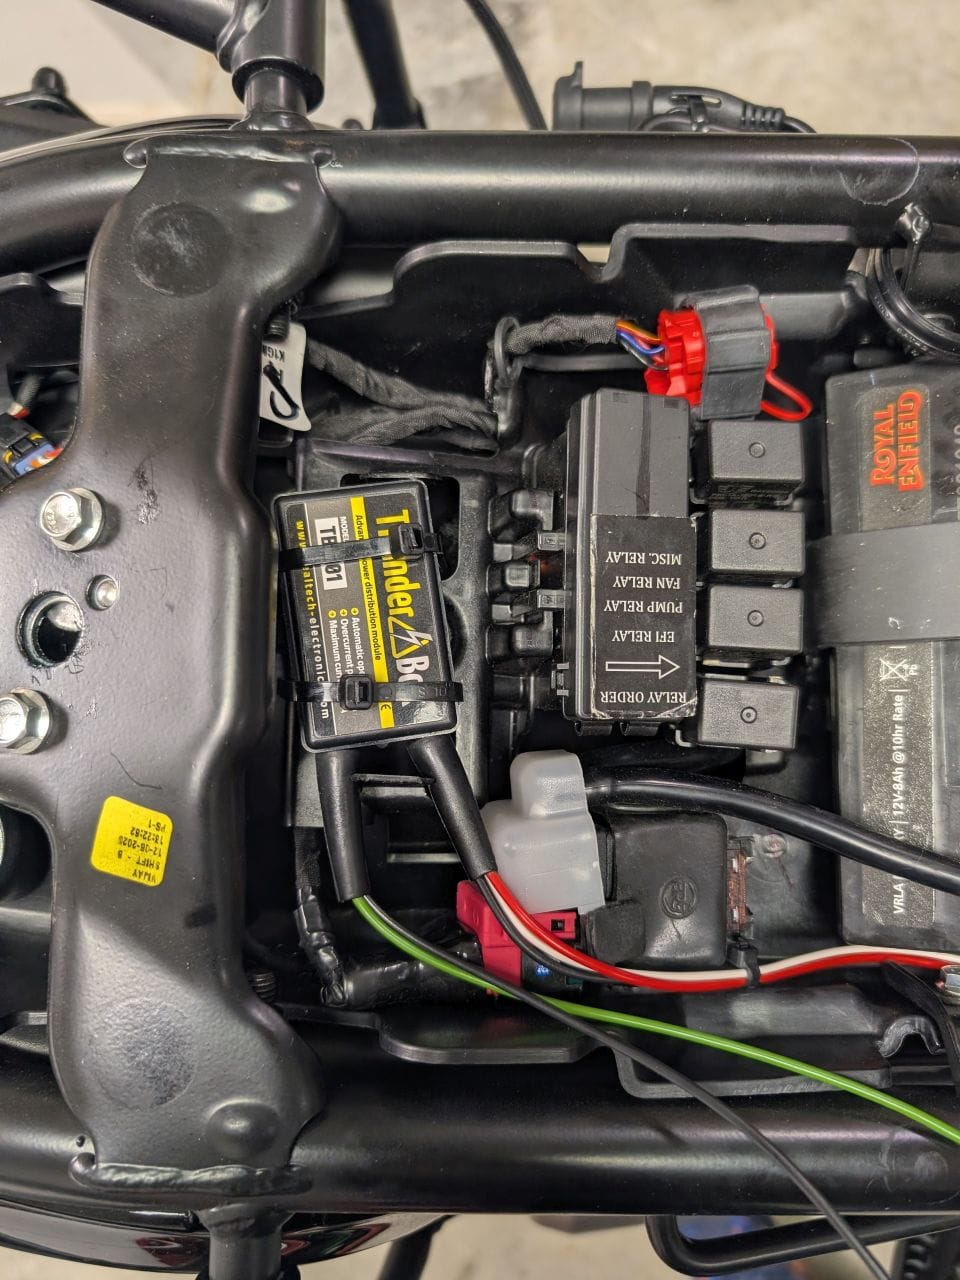
Mounting the Thunder Box behind the relay box.
I decided to place the box directly behind the relays. It is a snug fit but you can also secure it with two zip ties. It does not move and it is close to the battery. Just wire the red and black wires directly to the battery and this installation is complete.
Next up was the SP Connect phone charger. This was a simple install. Run the wire back and connect to the Thunder Box. I did not zip tie these wires yet since there are going to be some more when installing the new lights.
The lights I purchases are from Auxbeam. They were not very expensive but have gotten a lot of great reviews. This is my first time installing auxiliary lights on a motorcycle and did not want to drop a ton of money. The main goal for me was to see better at night. I went back and forth on replacing the headlight itself. The stock one is not bad but it could be a lot better. I decided to go for the auxiliary lights first. I can always replace the headlamp if needed later.
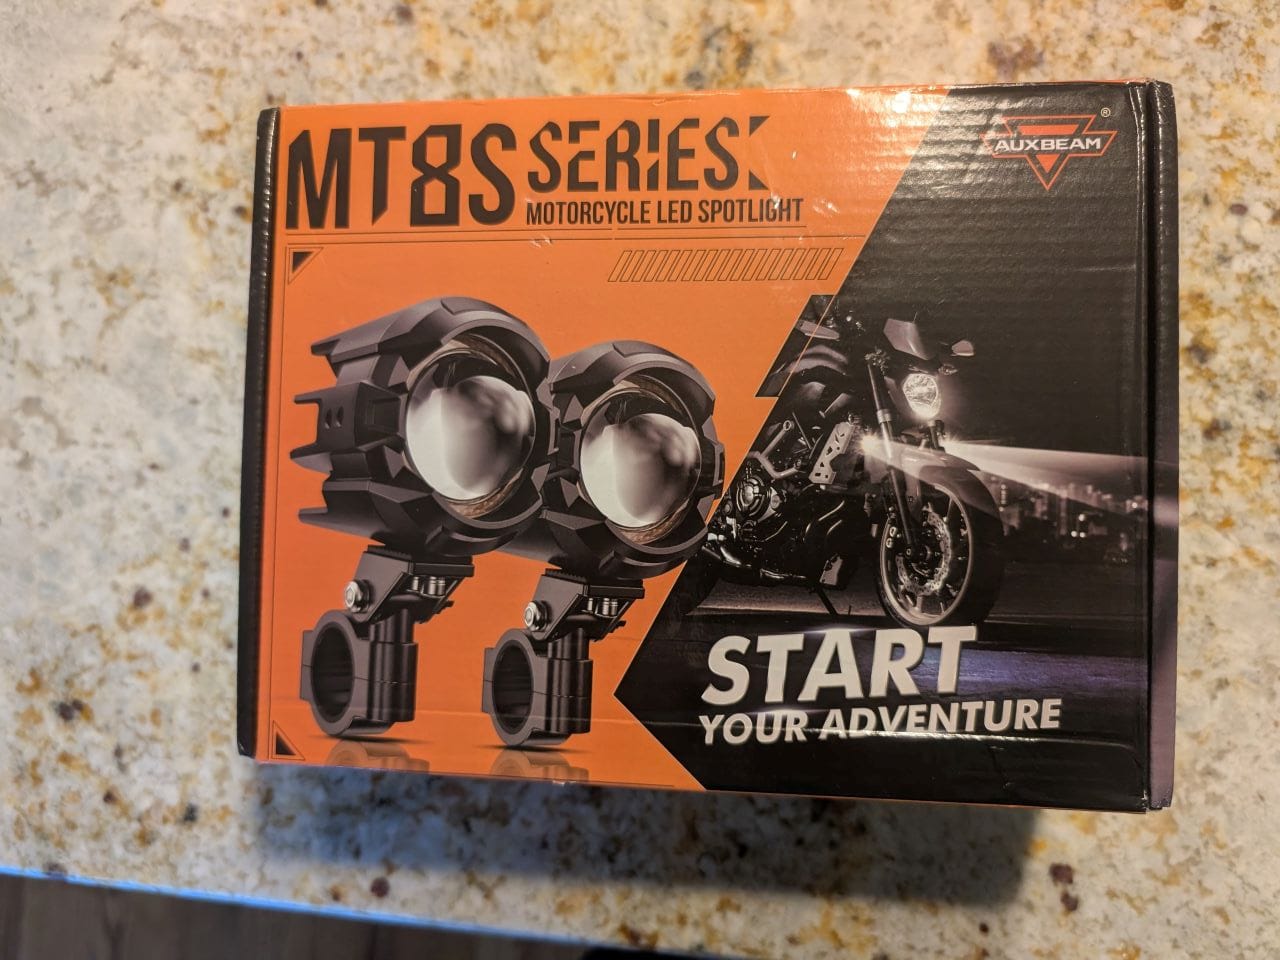
The new Auxbeam auxiliary lights
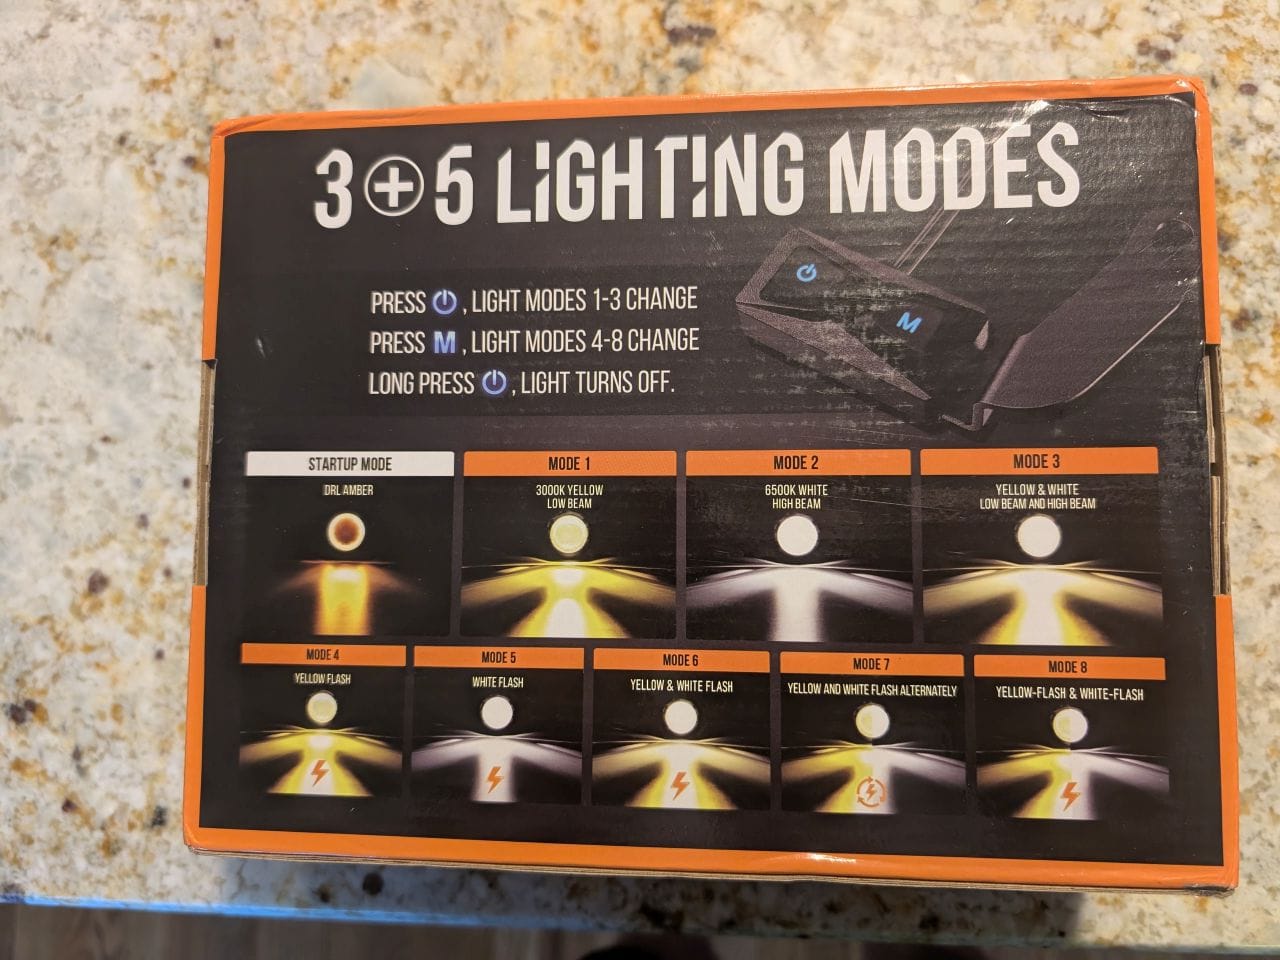
What is interesting about these lights is that you have amber and white in one unit (you do not need to replace lenses). It also has different light modes that flash and blink the lights if needed. Not sure if I will use the flashing mode but it will definitely get you noticed.
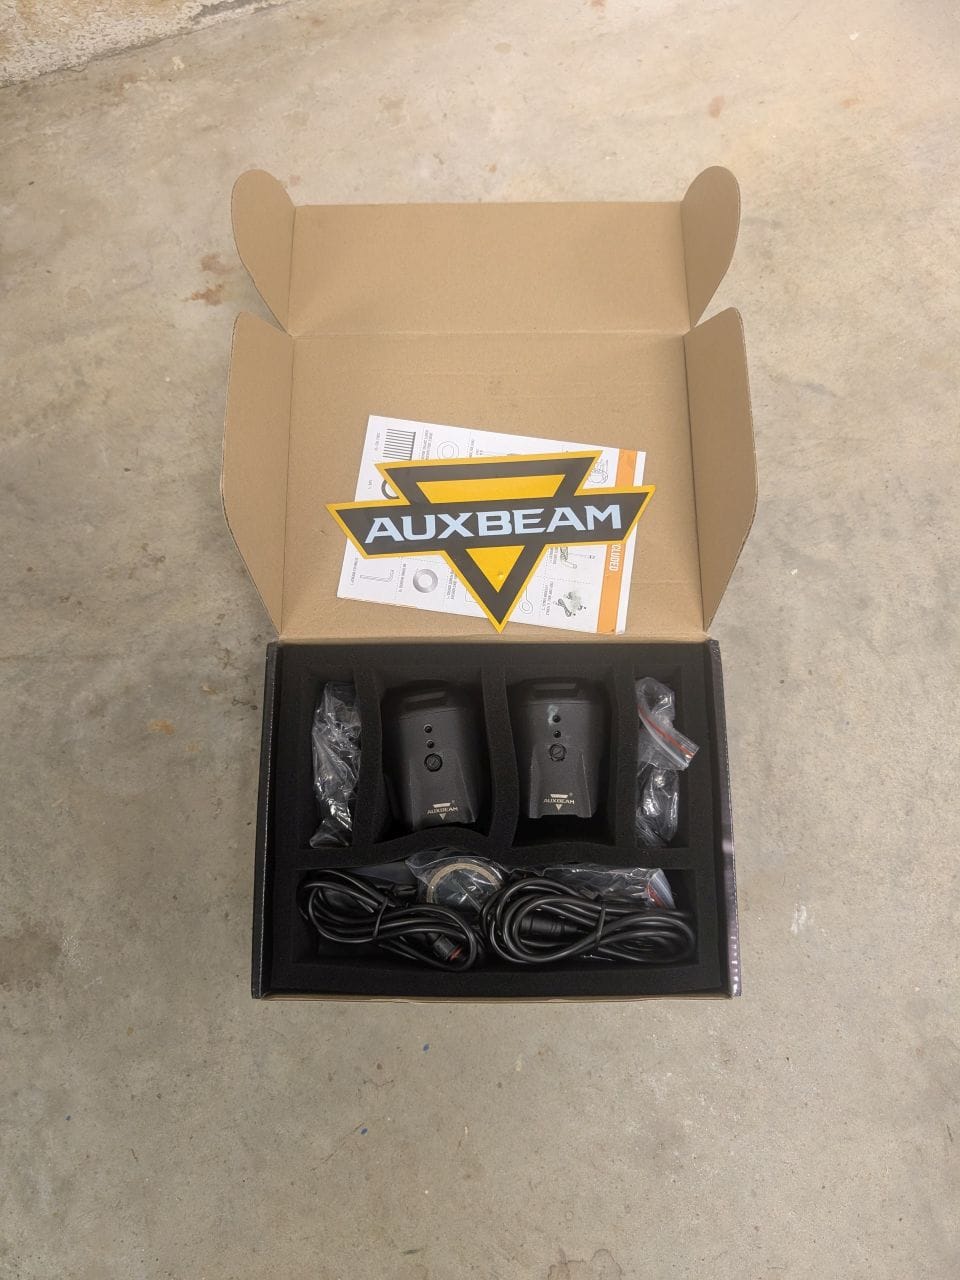
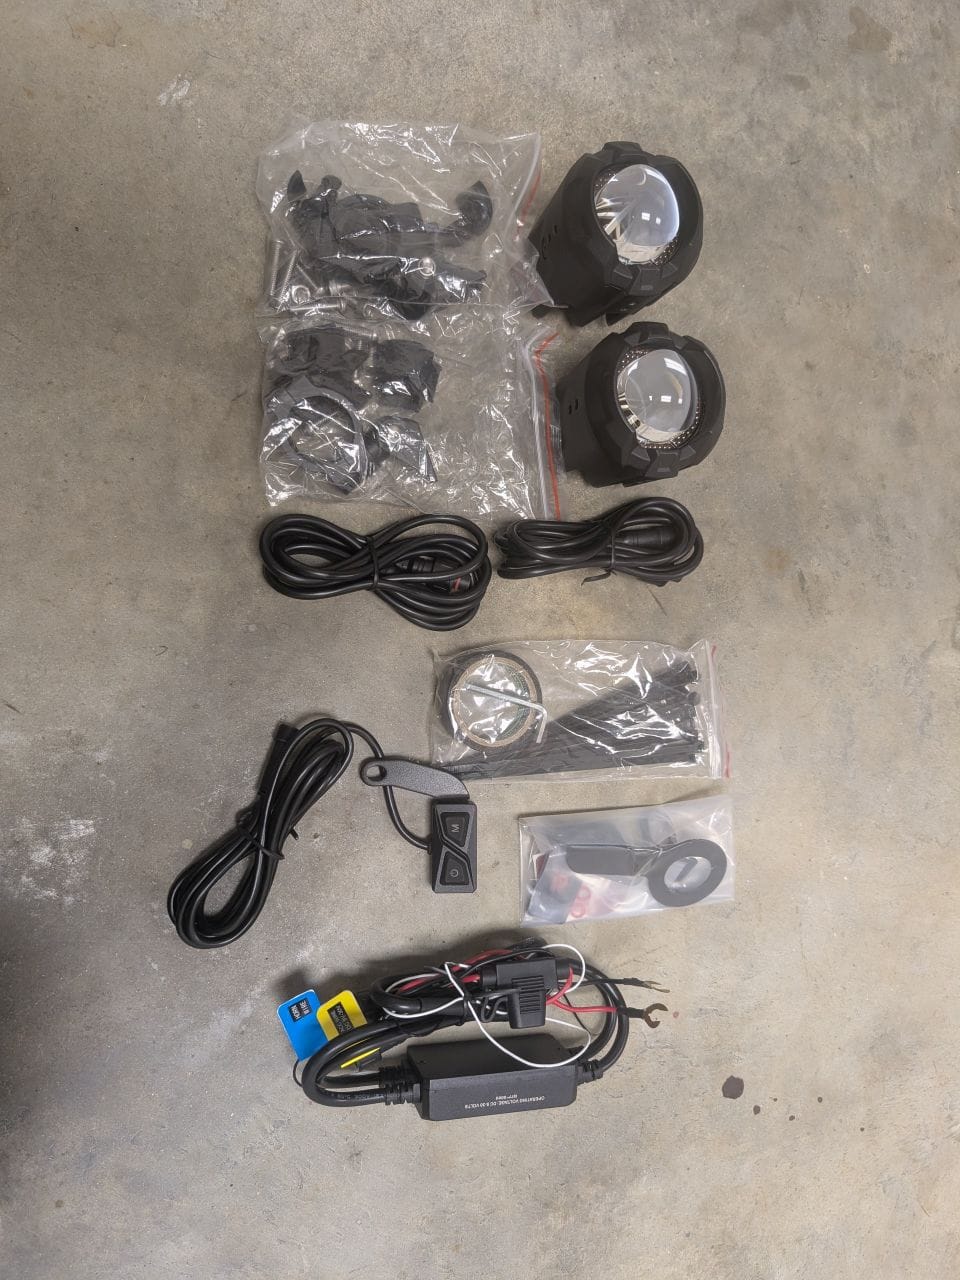
Contents of the Auxbeam lights
It was very well packaged. There are the two lights, mounting brackets (they fit 22/25/28mm). You just change out the rubber sleeves. There is also the light switch and the control box/fuse that everything connects to.
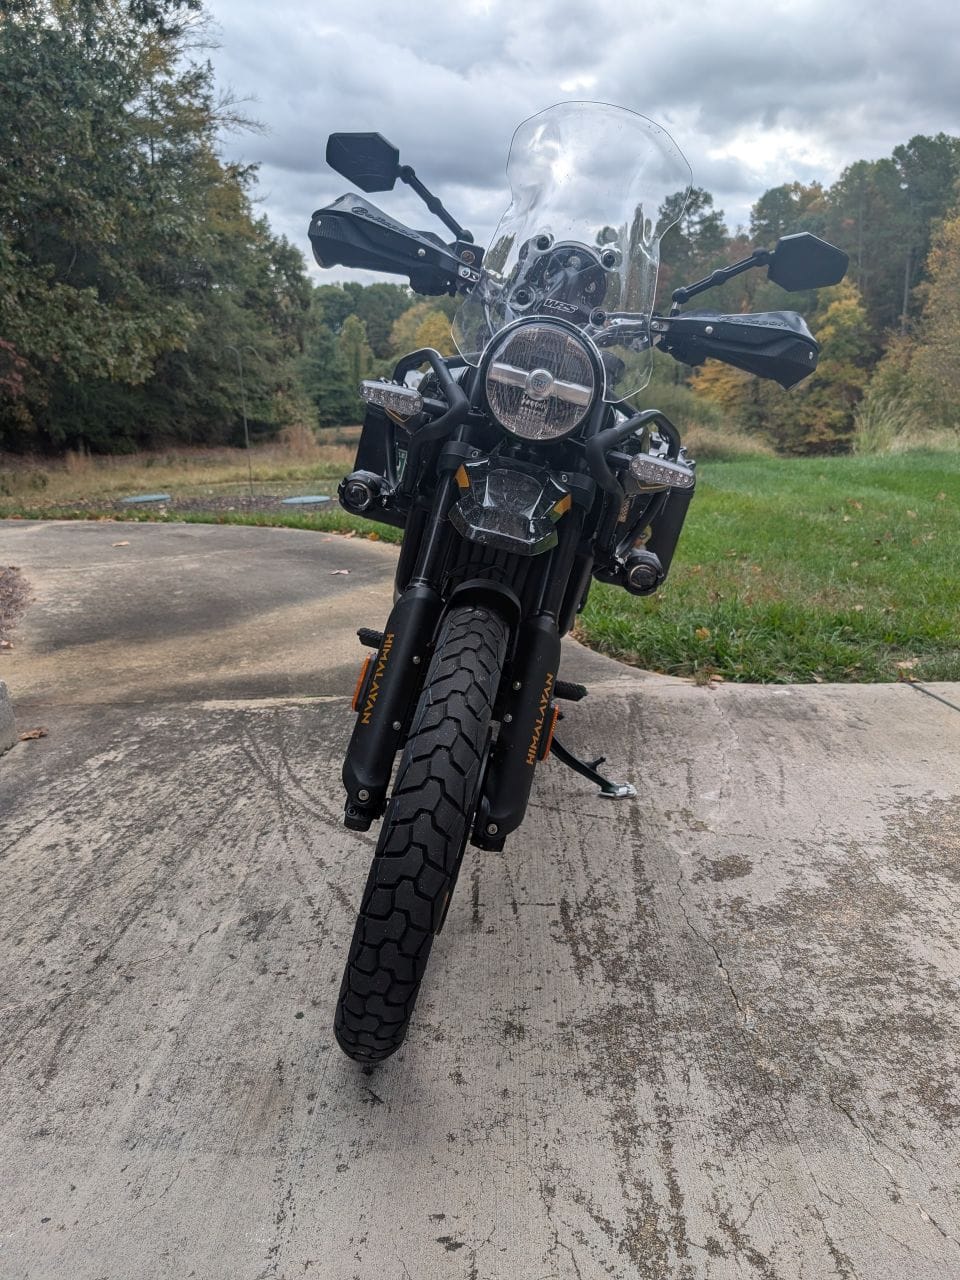
I decided to mount the lights first. The best place seems to be on the fuel tank guard. With these lights, there are screw holes on all 4 sides of the light so mounting on top, side, or bottom is not an issue. But be aware that there is a right way to mount them and a wrong way. If you look at the image, the lights have the Auxbeam logo and vent. This MUST always be on the top. The lights have a wide beam so if you mount it on the sides, you will get a very prominent vertical beam of light.
I decided to side mount the lights. There was a bit of trial and error on the exact positioning. I did not want the beam to be blocked by the fender or forks or at least to minimize its effects. Once you find a location that you like, loosely fit the light and bracket to the guard. Then make sure you turn the handlebars fully to ensure they do not hit.
My first optimal location did not work as the fender hit the lights. After a bit of moving them around, I found a suitable location. They do stick out further than I like but that is fine. Again, these are not expensive lights.
With lights mounted, time to find a location for switch. The switch comes with multiple mounting plates. I just use the one that was installed in the box. I decided to mount it on the screws that hold the mirror and switches in place (yes, I know it is upside down).

I did have to use two washers behind the mount so it would not rub against anything. I do like the location even though it is upside down (not like I look at the icons). With that is place, now we can find a home for the controller box.
As I said before, there is not a lot of space to hide bulky items under the seat. I tired various locations for the box but it just would not fit. I wanted to keep it looking clean but ultimately decided on placing the box in front of the relays behind the battery. Yes, it does block the battery partially but it was the only are that made sense.

Before wiring it all up, I wanted to make sure that all the wires and cables would be able to reach the box. As you can see in the picture, that is the rough placement of the box and all the wires could reach it. Besides the red/black wire, there is also a white wire (yellow tag) and a black wire (blue tag). To wire this up, the red/black go to the Thunder Box (instead of the battery). The white wire ALSO need to go to the positive connection of the Thunder Box. This wire is typically wired to an ignition wire so when the bike is on, it gets power and tells the lights to turn on. Since the Thunder Box controls the power, just treat it like an ignition switch. The black wire is optional. This is supposed to go to the horn. If you wire it up, when the horn is pressed, the lights will flash. I opted to skip it since I do not want to splice into the wiring harness (cool feature though).
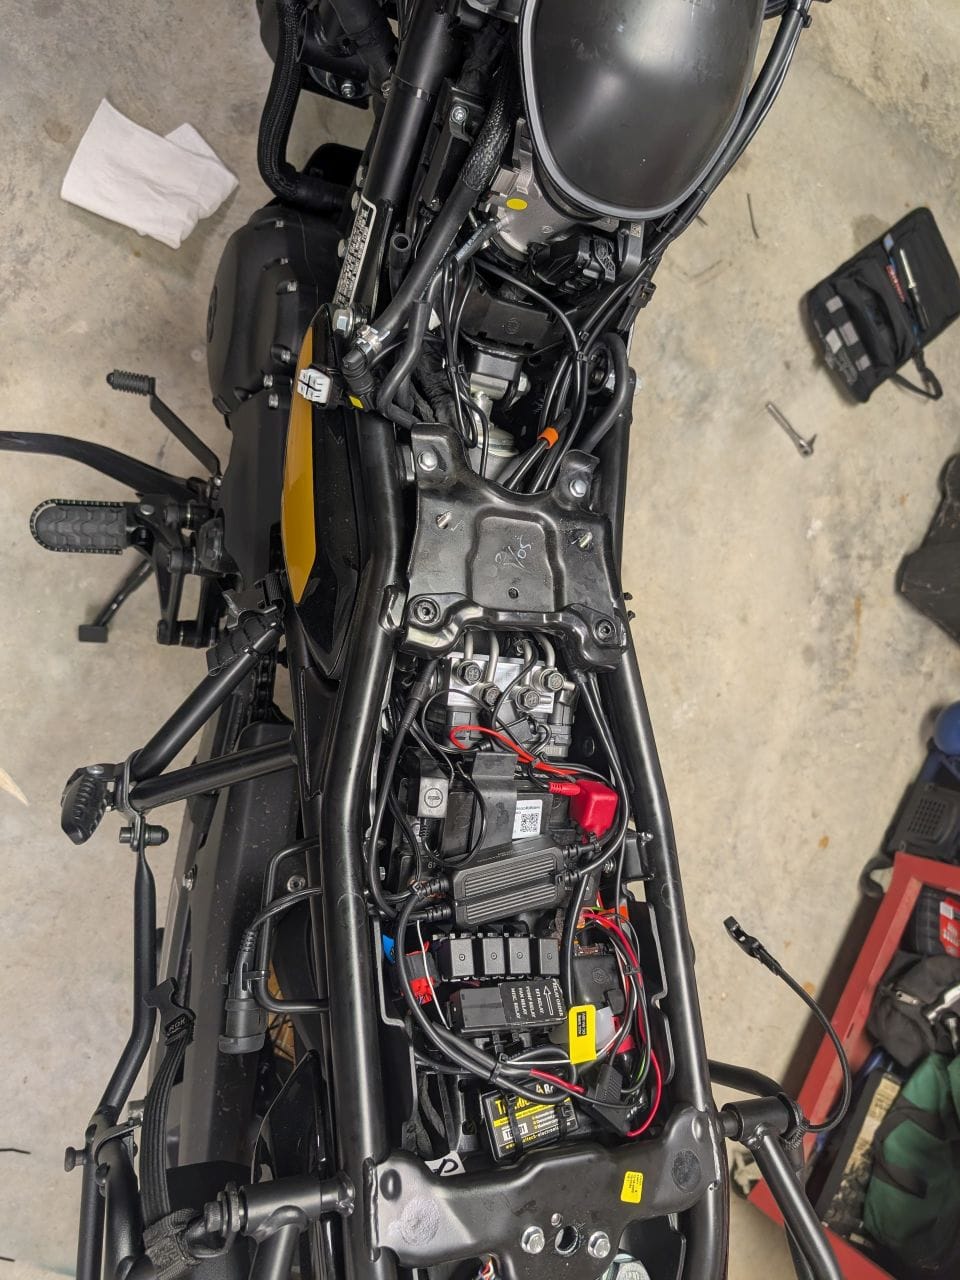
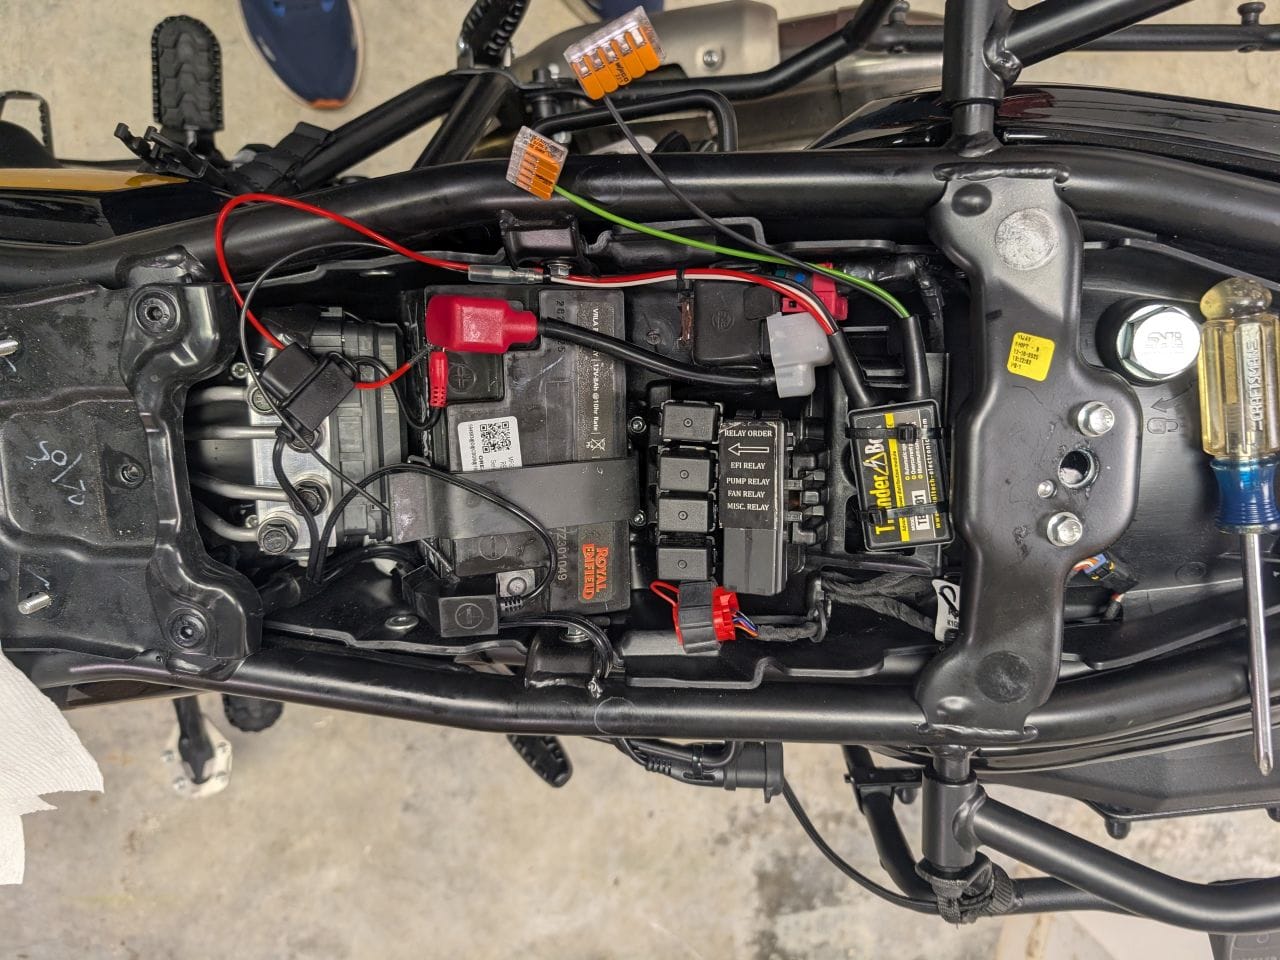
I connected all the wires and tucked them away. I still need to mount the box (zip ties) so it will not move but you get the idea. The true test will be testing the lights. The only issue is that I need to start the bike and the gas tank needs to be put back on. Not a difficult procedure but just be careful not to scratch it.
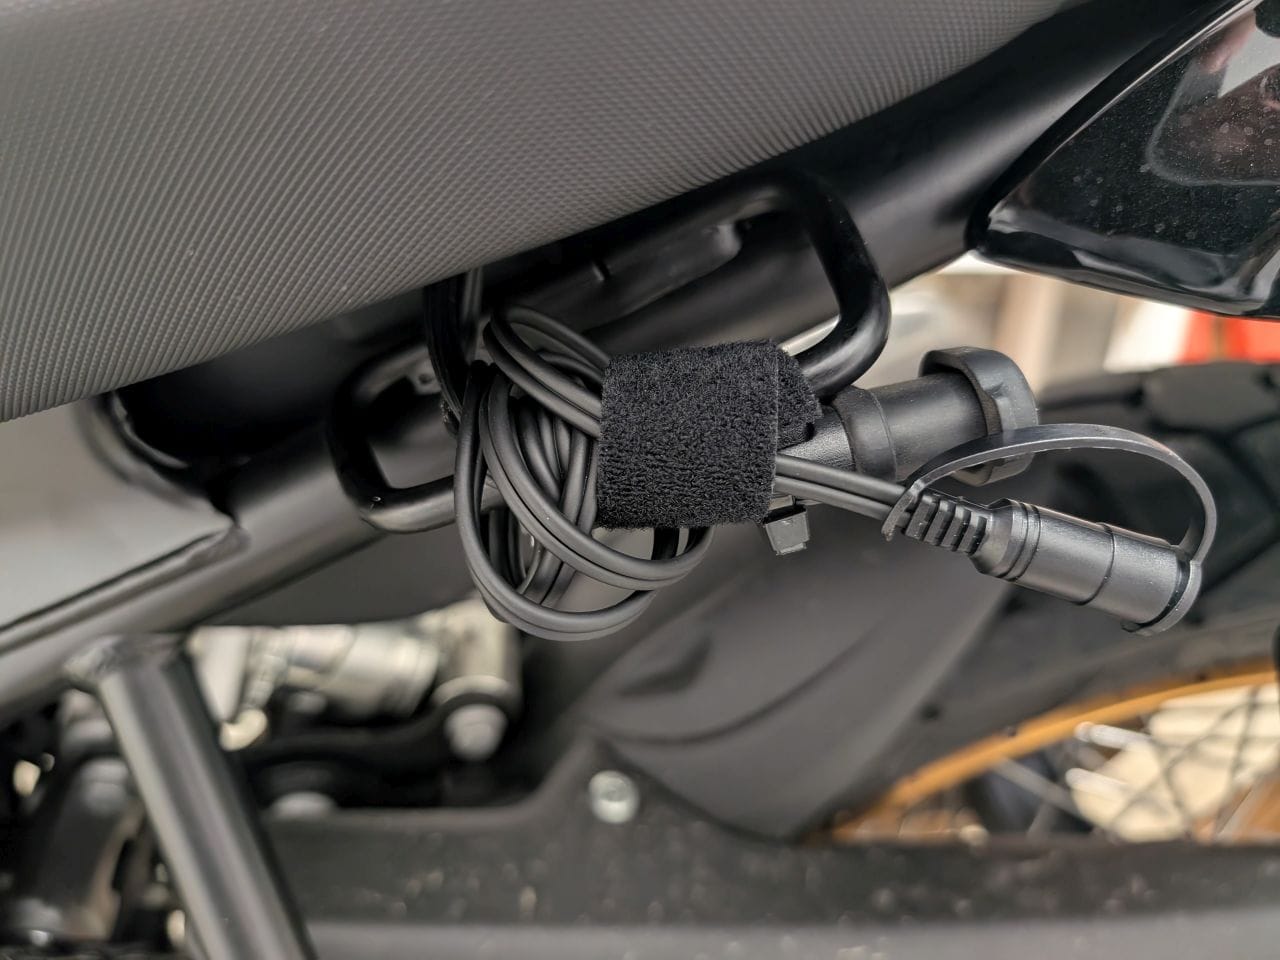
The last thing to wire up is the heating jacket plug. Since the plug will remain near the seat, you do not need to run the wires under the gas tank. My jacket has the plug on the left side of the jacket so the plug will also be placed on the left side of the bike. I snipped off the ring connectors and connected to the Thunder Box. Then ran it under the seat where my charging dongle is. The cord is long so I wrapped it around and then attached with velcro with the dongle.
Once all installed, fired up the bike and tested all the connections. Everything worked as expected. The part of this install is to aim the auxiliary lights. I waited until dark then parked the bike 25ft from my garage. I measured the height of the headlamp and marked that with tape on the garage. I measured the height of the auxiliary lights and marked it on the garage. I measured the distance between the two lights and marked vertically on the garage. I put tape at 3 inches below the headlamp tape to check the alignment of the headlamp. I marked 3 inches below the auxiliary lights as well. Started the bike and proceeded to adjust the lights until they hit all their targets.
Now that everything is working, all that is left is to drive it, especially at night and see how the lights "light up" the road. Hopefully seeing well is a thing of the past.